How to Install Nutanix Community Edition (NCE) on a Single-Node Server
For quite some time, my small home lab has been the place where I like to test and learn new things. It started with three nodes, but today I just run a single ESXi server. On that host, I experimented with PiHole and Kubernetes, but recently I decided it was time to try something new since I have hardware lying around: Nutanix Community Edition (NCE)
Preparing for the Installation
Create an account on next.nutanix.com and download the ISO from here: https://next.nutanix.com/discussion-forum-14/download-community-edition-38417
Download the appropriate USB imaging software, such as Rufus (you must use Rufus v3.2.1) or UNetBootin, and image your USB drive from the Installer ISO file.
In the Rufus UI, you can set the partition scheme and target system in one of the following ways:
- Partition scheme: MBR, Target system: BIOS or UEFI
- Partition scheme: GPT, Target system: UEFI (non CSM)
Note: This step is not needed if you load the Community Edition installer ISO directly with the Virtual Drive feature of IPMI on your host instead of a USB flash drive. That’s the case for me.
Important: Nutanix Community Edition reserves IP addresses 192.168.5.0 through 192.168.5.254 for internal networking. Since the same address range cannot be used, the host (hypervisor) and the Controller VM (CVM), must be connected to a network with a different subnet other than 192.168.5.0.
Good to know: All host and Controller VMs in the same cluster must be on the same subnet.
- Host IP address (for the Community Edition hypervisor host)
- Controller VM IP address – This value becomes the virtual IP address that enables you to log on and manage the cluster through the Prism web console or an SSH terminal connection
I followed these instructions to install Nutanix Community Edition: https://portal.nutanix.com/page/documents/details?targetId=Nutanix-Community-Edition-Getting-Started-v2_1:top-installing-ce-t.html
Booting and Installation
1) Start the node and boot from ISO (IPMI) or USB.
2) When the boot sequence finishes, the CE installer dialog appears.
3) Verify or adjust the disk selections and enter the requested network details.

4) Press Enter and go to the next page. Wait for the CE EULA to appear.
Important: You need to scroll down to the end of the EULA. Otherwise, the installation will fail at the next step.
5) Press Tab and accept the EULA. Use the arrow keys to navigate to “Start” and press “Enter”.

6) The installation process displays status messages on the screen.

7) When the imaging process finishes, a prompt appears to remove the CE installation media.

8) Remove the CE installation media and press the y key and press “Enter”
The host automatically restarts and finishes the installation process. After the host restarts, the initial CVM configuration is automatically applied.
After the host restarts, the AHV host and the CVM run their first boot setup processes. These processes can take 15 to 20 minutes to complete, depending on host performance.
After these processes finish running, you can perform the following steps:
9) Open an SSH session to the CVM IP address (192.168.2.21 in my case)
- The username is nutanix and the password is nutanix/4u.

10) If you are creating a single-node cluster, run cluster create as follows, replacing cvm_ip with the CVM IP address: cluster -s cvm_ip –redundancy_factor=1 create
Important: Use the IP address that you assigned to the CVM during installation. Don’t use the CVM internal IP address (192.168.5.2).

11) A series of messages indicates that the cluster is being created and cluster services are starting. When the process is finished – this took about 10 minutes for me, the cluster creation message is displayed, and the prompt returns.

12) Define the cluster name by using the command “ncli cluster edit-params new-name=cluster_name”

13) Configure a name server for the cluster by using the command “ncli cluster add-to-name-servers servers=public_name_server_ip_address”

14) Configure an external IP address for the cluster by using the command “ncli cluster set-external-ip-address external-ip-address=cluster_ip_address”

15) Add an NTP server IP address to the list of NTP servers by using the command “ncli cluster add-to-ntp-servers servers=NTP_server_ip_address”

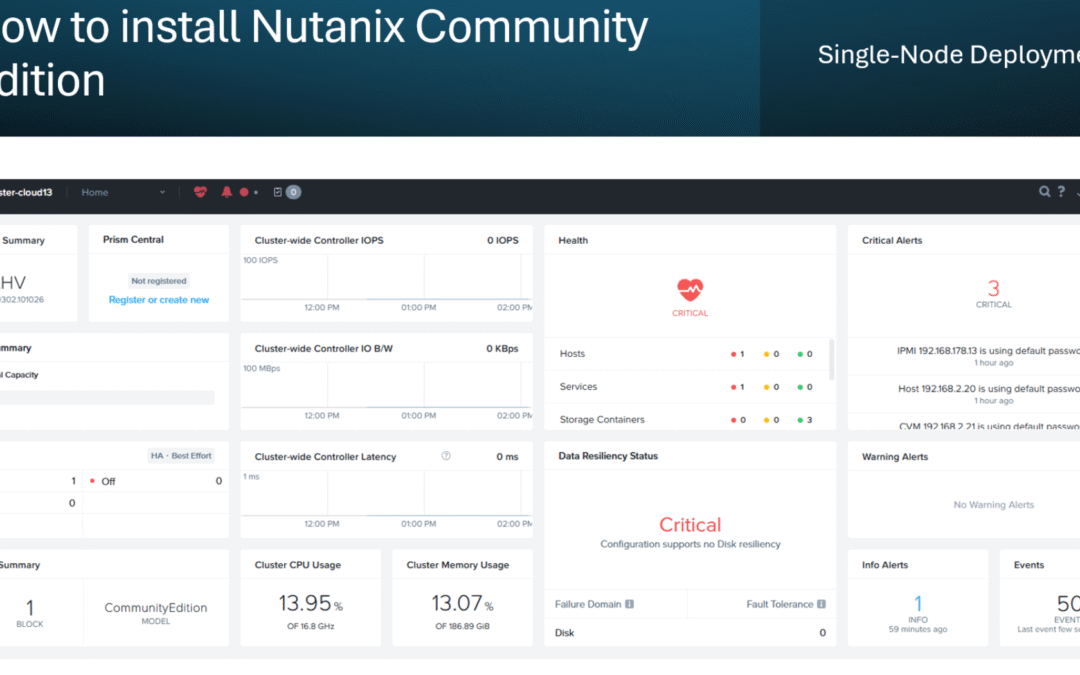
Logging into Prism
Now it’s time to access the web console.
16) In a web browser, navigate to http://management_ip_addr, replacing management_ip_addr with the IP address of any CVM in the cluster.
- The browser redirects to the encrypted port (9440) and displays an SSL certificate warning.
- Sign in with the default admin account username and password.
-
- Username: admin
- Password: nutanix/4u
17) After you are requested to change the default password, you’ll be asked to log in again.

18) At the next step, you have to enter your Nutanix community account username and password.

19) Congratulations! You now have deployed your first Nutanix Community Edition node like me! 😀