Moving away from VMware to Nutanix makes sense when…

Moving away from VMware to Nutanix makes sense when…

You shouldn’t be asking “Which platform has the longest feature list?” but “What outcome justifies the cost of moving from one private cloud stack to another?“. This is precisely where many VMware by Broadcom customers find themselves today. While there are still many loyal VMware customers, there are other organizations that want or must re-evaluate their current situation. And a simple but often forgotten truth is this: a like-for-like platform replacement rarely makes sense.

Not because Nutanix cannot do what VMware does. It absolutely can! But because the economics and operational impact of migrating an entire virtual estate purely to reproduce the status quo will not automatically create value. Unless Broadcom’s new price structure forces the customer’s hand or the relationship with the vendor becomes unbearable for non-technical reasons, a one-to-one replacement is just a reaction, and not a strategic move.

A change of platform needs a reason that transcends replacement. It needs intent.

And this is where the conversation becomes interesting, because the moment a customer begins thinking beyond “keep everything the same”, Nutanix suddenly becomes much more than a substitute or alternative. It becomes a platform for a new chapter.

Application Modernization

It’s almost 2026 and guess what, most enterprises (still) live in a VM-centric world and some of them are just starting now to modernize applications, modernize operations, and converge their infrastructure and cloud strategies. So, they look at Kubernetes, container orchestration and DevOps practices not as “modern” anymore, but as mandatory capabilities for the next decade.

Trying to retrofit these ambitions into a purely VMware-centric future is possible, but rarely elegant. Costs accumulate. Tooling becomes fragmented. Operational models start to diverge.

Nutanix provides a clean path into a Kubernetes-native, cloud-architected operational model through Nutanix Kubernetes Platform (NKP) and Nutanix Cloud Infrastructure (NCI) as the unified foundation.

Nutanix Kubernetes Platform Open Source

If an organization wants to build for the next generation of workloads rather than the last, platform migration becomes a strategic investment. And the cost of change is suddenly justified by the long-term trajectory.

AI becomes real. Sovereignty becomes mandatory.

Over the past year, enterprise AI has evolved from theory to a board-level priority. However, deploying secure, compliant, and controlled GenAI infrastructure is not something legacy stacks were designed for. GPU clusters, high-throughput storage, inference pipelines, and air-gapped architectures. All these require a platform that is not only modern, but sovereign, composable and operationally manageable.

Nutanix Enterprise AI

Nutanix offers a cohesive, GPU-ready, open ecosystem designed to host your own models, your own data, and your own AI stack.  Sovereign, isolated, and fully under your control.

Nutanix Enterprise AI (NAI) turns AI infrastructure into something deployable rather than experimental. Together with NCI and NKP, it forms an environment where customers can build internal AI factories without relying on hyperscalers or exposing sensitive data.

Flexibility in storage architecture

Recently, Nutanix announced support for external storage – starting with Dell and Pure Storage.

Nutanix and Pure Storage


For the first time, customers can bring their existing enterprise storage arrays into a Nutanix architecture without forcing a forklift replacement or abandoning multi-year investments.

This fundamentally changes the economics of a VMware-to-Nutanix transition. What used to be a full-stack change can now become an incremental evolution. Keep the storage infrastructure you already trust, maintain the performance characteristics your applications rely on, and modernize the compute and virtualization layer above it.

Nutanix is acknowledging that customers do not live in greenfield worlds, that not every journey starts with a clean slate, and that sovereignty and autonomy often require preserving existing assets rather than discarding them.

For customers who want to move away from VMware but cannot replace their storage systems, Nutanix now offers a transition path that aligns with financial and architectural realities. For customers planning application modernization or sovereign AI initiatives, the ability to combine dedicated storage arrays with NCI and NKP gives them the freedom to architect the right performance tiers for each workload without vendor lock-in.

Cost pressure meets VDI realities

Desktop virtualization has always been the domain where infrastructure complexity causes the most harm. VDI environments are sensitive, cost-intensive, and operationally unforgiving. If a customer is looking for a cheaper, simpler and more predictable platform for VDI, Nutanix becomes a compelling candidate and it offers an architectural shortcut by providing consolidated storage and compute, extremely fast storage performance, linear scaling, and dramatically simpler day-to-day operations. The cost-to-outcome ratio is hard to ignore.

Nutanix and Omnissa

In such scenarios, the platform transition is less about “leaving VMware” and more about optimizing the future economics of delivering virtual desktops with a more efficient stack.

Recently, Nutanix and Omnissa announced that Omnissa Horizon now fully supports Nutanix AHV.

Conclusion

Ultimately, the decision to move away from VMware (or any other vendor) should never be driven purely by frustration or speculation. It should be driven by clarity.

If the only goal is to continue exactly what you do today, with the same architecture and application landscape, then the cost of change often outweighs the benefits. Unless Broadcom pricing leaves no room for rational continuity.

Nutanix is about “accelerating”, and your decision shouldn’t be about “escaping”. And that distinction is what separates good decisions from expensive reactions.

When motivation is driven by evolution, Nutanix becomes a foundation for the next chapter of your digital strategy.

And that is exactly the moment when moving away from VMware begins to make profound sense.

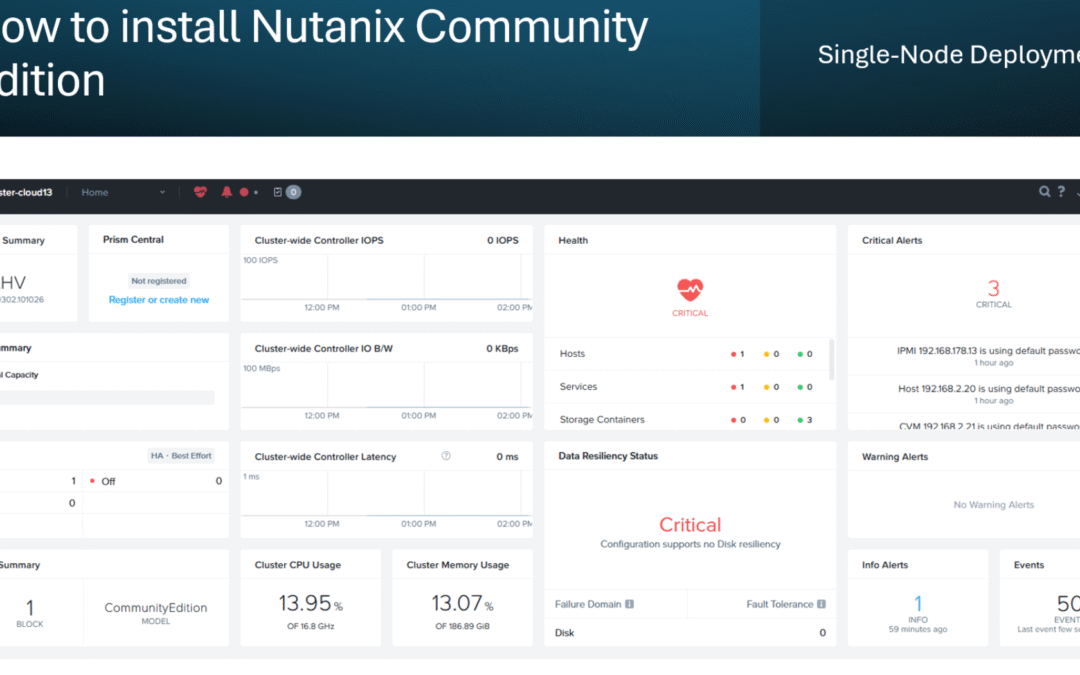
How to Install Nutanix Community Edition (NCE) on a Single-Node Server

How to Install Nutanix Community Edition (NCE) on a Single-Node Server

For quite some time, my small home lab has been the place where I like to test and learn new things. It started with three nodes, but today I just run a single ESXi server. On that host, I experimented with PiHole and Kubernetes, but recently I decided it was time to try something new since I have hardware lying around: Nutanix Community Edition (NCE)

Preparing for the Installation

Create an account on next.nutanix.com and download the ISO from here: https://next.nutanix.com/discussion-forum-14/download-community-edition-38417

Download the appropriate USB imaging software, such as Rufus (you must use Rufus v3.2.1) or UNetBootin, and image your USB drive from the Installer ISO file.

In the Rufus UI, you can set the partition scheme and target system in one of the following ways:

  • Partition scheme: MBR, Target system: BIOS or UEFI
  • Partition scheme: GPT, Target system: UEFI (non CSM)

Note: This step is not needed if you load the Community Edition installer ISO directly with the Virtual Drive feature of IPMI on your host instead of a USB flash drive. That’s the case for me.

Important: Nutanix Community Edition reserves IP addresses 192.168.5.0 through 192.168.5.254 for internal networking. Since the same address range cannot be used, the host (hypervisor) and the Controller VM (CVM), must be connected to a network with a different subnet other than 192.168.5.0.

Good to know: All host and Controller VMs in the same cluster must be on the same subnet.

  • Host IP address (for the Community Edition hypervisor host)
  • Controller VM IP address – This value becomes the virtual IP address that enables you to log on and manage the cluster through the Prism web console or an SSH terminal connection

I followed these instructions to install Nutanix Community Edition: https://portal.nutanix.com/page/documents/details?targetId=Nutanix-Community-Edition-Getting-Started-v2_1:top-installing-ce-t.html

Booting and Installation

1) Start the node and boot from ISO (IPMI) or USB.

2) When the boot sequence finishes, the CE installer dialog appears.

3) Verify or adjust the disk selections and enter the requested network details.

NCE Installer Disks

4) Press Enter and go to the next page. Wait for the CE EULA to appear.

Important: You need to scroll down to the end of the EULA. Otherwise, the installation will fail at the next step.

5) Press Tab and accept the EULA. Use the arrow keys to navigate to “Start” and press “Enter”.

6) The installation process displays status messages on the screen.

7) When the imaging process finishes, a prompt appears to remove the CE installation media.

8) Remove the CE installation media and press the y key and press “Enter”

The host automatically restarts and finishes the installation process. After the host restarts, the initial CVM configuration is automatically applied.

After the host restarts, the AHV host and the CVM run their first boot setup processes. These processes can take 15 to 20 minutes to complete, depending on host performance.

After these processes finish running, you can perform the following steps:

9) Open an SSH session to the CVM IP address (192.168.2.21 in my case)

  • The username is nutanix and the password is nutanix/4u.

10) If you are creating a single-node cluster, run cluster create as follows, replacing cvm_ip with the CVM IP address: cluster -s cvm_ip –redundancy_factor=1 create

Important: Use the IP address that you assigned to the CVM during installation. Don’t use the CVM internal IP address (192.168.5.2).

11) A series of messages indicates that the cluster is being created and cluster services are starting. When the process is finished – this took about 10 minutes for me, the cluster creation message is displayed, and the prompt returns.

12) Define the cluster name by using the command “ncli cluster edit-params new-name=cluster_name

13) Configure a name server for the cluster by using the command “ncli cluster add-to-name-servers servers=public_name_server_ip_address

14) Configure an external IP address for the cluster by using the command “ncli cluster set-external-ip-address external-ip-address=cluster_ip_address

15) Add an NTP server IP address to the list of NTP servers by using the command “ncli cluster add-to-ntp-servers servers=NTP_server_ip_address

Logging into Prism

Now it’s time to access the web console.

16) In a web browser, navigate to http://management_ip_addr, replacing management_ip_addr with the IP address of any CVM in the cluster.

  • The browser redirects to the encrypted port (9440) and displays an SSL certificate warning.
  • Sign in with the default admin account username and password.
    • Username: admin
    • Password: nutanix/4u

17) After you are requested to change the default password, you’ll be asked to log in again.

18) At the next step, you have to enter your Nutanix community account username and password.

19) Congratulations! You now have deployed your first Nutanix Community Edition node like me! 😀